A sewing blog about building a functional, cohesive handmade wardrobe, one garment at a time.

Wednesday, June 28, 2017

The One Where I Outsmarted Myself

I recently made a couple of tops using the new Pony Tank pattern from Chalk and Notch.  It's a simple tank, but it took me two muslins and a not-quite-right "wearable muslin" before I finally figured out ... that I didn't need so many adjustments after all.


After sewing a variety of different knit top patterns, I am at the point where I automatically cut a smaller size in the shoulder and then grade out to my full bust measurement under the armscye.  I did the same on this tank, but I shouldn't have.

I made two muslins using a rayon jersey that turned out to have really crummy recovery.  The size 8 (which matches my high bust) shoulder didn't cover my bra straps.  I was worried that the size 16 (which matches my full bust, and to which I graded at the bottom of the armscye) would gape in the neckline, so I just widened the size 8 strap a little and added some fabric in the armpit for this version. I kept the depth of the size 8 armscye, since i found on my muslins that the size 16 definitely let my bra band hang out.  I also botched a forward shoulder adjustment on this version, causing the front of the top to ride up.  I actually still like it quite a bit.  The fabric is an ITY knit from Joann's, and I love the print.


After that, I took a deep breath and retraced a straight size 16.  I did a 3/8" forward shoulder adjustment and raised the armscye to the depth of the size 8 again.  And what do you know, it was perfect!  I was shocked - I am never a straight size in the shoulders and bust, even in knit tops!  It's perfect.  I love the length, the fitted top and the swingy bottom.  I find that a lot of swingy top patterns start their swing too far up the bust, causing a tent effect, but this pattern is nicely shaped all the way through the bust which makes it both comfortable and flattering.


I spent quite a bit of time thinking about pattern placement and cutting the fabric (a rayon/lycra jersey from Joann's).  Unfortunately, I didn't take into account how the rayon would stretch vertically from the weight of the fabric, and I ended up with bust medallions despite my best efforts.  Worse than that, they are crooked bust medallions.  I know this would bother a lot of people, but I've been wearing the top anyway and no one else seems to have noticed.


I only have one quibble with the pattern.  It is flared from the waist through the hem, but the hem allowance flares away from the shirt even more.  This means that there is too much ease in the hem allowance, causing the hem to flutter if you stretch it to fit.  I think the hem allowance should angle inward so that when you fold it up, it is the same width as the top.  This is an easy enough fix for future sews, though.


I also made the linen pants I am wearing in the photo; I'll be blogging those later on.  I made all three items to wear together, so I guess this is a microcapsule.  And I'm hoping to make a couple more of these tanks before we head to the beach in August.  Thanks for reading and see you next time!
SaveSave

Tuesday, June 20, 2017

Replacement Josephine

The Josephine tank I made last year fell apart in the wash. Thankfully, I had just enough of this gorgeous Kaffe Fassett rayon challis fabric left to redo it.


I've sewn the pattern twice before, and each time I've had to make a number of adjustments to get it to fit my body.  Some of those adjustments were alterations done on the fly, and I still didn't have it quite right.  So this time, I reprinted my pattern and made another muslin.


Thanks to the second muslin, I think I finally cracked the magic combination of pattern alterations to get it to fit me the way I want.  Firstly, I realized that the shoulder is just too wide for me, even though I have been using my high bust measurement and doing an FBA.  So this time, as usual, I started with the size large C/D cup with an FBA (using a French dart that angles up from the waist rather than a horizontal dart).  I also narrowed the straps, mostly from the armscye, which I also lowered and scooped out a bit at the armpit to deal with excess fabric.


Wait, I'm not done yet.  I also did a forward shoulder adjustment, shortened the straps by 1/2" (so maybe I lowered the armscye too much), lowered the neckline and made a hi-lo split hem.  My muslin also had some back neckline gaping.  I am sure my original Josphines had this problem too, but I guess I have been so used to back neckline gaping that I didn't really notice it.  All my fitting practice has got me looking at my clothing more critically now.  To fix the gaping, I turned my single back piece into two pieces with a back seam.  I sliced an inch off the pattern piece at the top center back, tapering to nothing around my waistline, and now the back neckline sits beautifully.


On my last top, I had a bear of a time putting on the (rayon) bias binding.  Part of it was the fabric and part of it was my machine's tension going haywire halfway through the sewing.  I had to unpick and resew it a few times, and I guess the rayon just couldn't take any more, and ended up shredding in the wash.  So this time, I made my bias binding out of cotton shirting. But even having done that, I'm not sure I will let this one near the washing machine.  I had to clip the neckline more than every 1/4" to get it to lay flat.  Knowing how close I clipped to the seamline makes me nervous!


I recently had a look at Rae's original sleeveless version for this pattern and I realize that there isn't much of a resemblance anymore.  But really, most of the work I did was to the upper bodice.  The shape of the top through the waist down is the original draft, as are, of course, those gorgeous pleats.

The pleats (and also frugality and laziness when it comes to tracing/printing/cutting a new pattern) are the reason that I stuck with this pattern despite the fact that it just doesn't fit me at all, out of the envelope.  I probably could have modified a different pattern to add the pleats, but I didn't want to.  And all's well that ends well, except now I have a hankering to refit the sleeved pattern too, for fall, which will involve more armscye tinkering and a totally new sleeve.


For now, though, I'll enjoy my breezy new top.  Thanks for reading, and see you next time!
SaveSave

Tuesday, June 13, 2017

Gallery Tunic, finally

I've had this pattern in my stash for awhile, but I knew I'd need to do some work to make it large-bust friendly.  So it sat.  I spent most of the winter and spring sewing knits.  I don't know about you, but sometimes I find it hard to switch between sewing woven and knits.  I was definitely in knit mode for awhile.  But after sewing a couple of Bonn shirts, I felt up to the task.

I did not muslin.  I did do a bit of tissue fitting and a number of flat pattern adjustment before cutting my fabric.  The result is pretty good but could use a little more work.


The first order of business was an FBA.  I started with the size 8 (which corresponds with my 36" high bust) and did a large FBA to accommodate my 41.5" full bust. As the FBA widens the whole piece, I just made sure that I cut the side seams along the lines for the size 16 (including at the bottom of the armscye, which I had to widen anyway so that my adjusted sleeve would fit into it).  I graded the back to a 16 under the arms as well, keeping the size 8 shoulder.  Although I am used to choosing sizes based on high bust, I always pause while altering my pattern pieces, thinking "is that tiny size really going to fit my shoulders and upper chest?"  But it always does.  And in this case, once again, I am very pleased with the collar and shoulder fit.


I always require a forward shoulder adjustment, so I just pinned the pattern pieces at the shoulder and draped them over myself to figure out how far to adjust.  I settled on a 3/4" adjustment.  While I was adjusting the sleeve cap forward, I also did a 1.5" full bicep adjustment on the size 8 sleeve.   I pinned the sleeve seams together after I'd assembled the rest of the garment save for side seams, and based on that quick fitting, I sewed the whole sleeve with a 1/4" seam allowance instead of 1/2".  I still need a smidge of extra room - next time I will do a 2" full bicep adjustment.  I have to remember that I am adjusting a much smaller sleeve than would actually be my size - if I were using the size 16 sleeve I would only need a small adjustment.

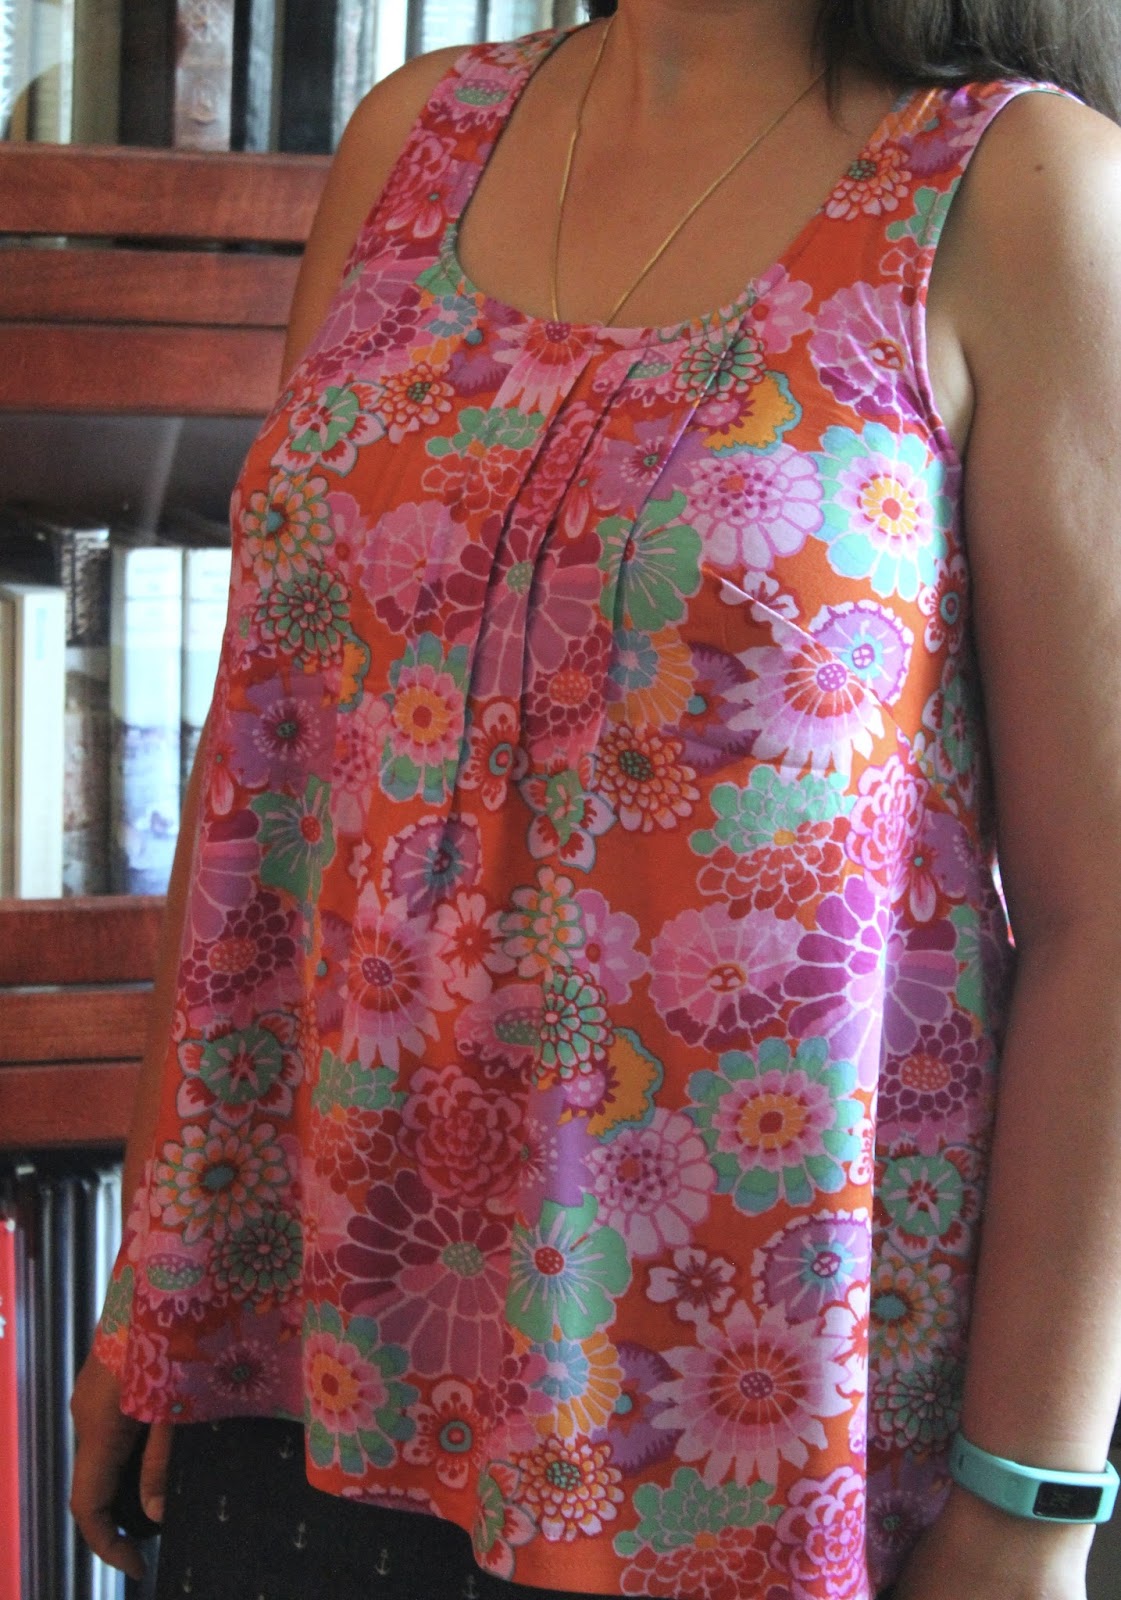
Finally, after looking at many, many photos of completed tunics, I lengthened the placket by 1.5". I figured (correctly, as it turns out), that the placket as written would look comically short on my bust.  Even with the extra length, the pleat still starts too far up my bust and I am aware that this totally looks like a maternity top.  I can only imagine how much worse it would be, had I not lengthened the placket, but I clearly need to lengthen it at least another 1.5" - maybe 2" or 2.5".  I could get through two trimesters in it, no question.

That being said, I actually still really love the top. The fabric choice was key here - anything more substantial than this floaty voile would have been a disaster.  The voile works with the volume of the top.  I love the resulting shape and I will be wearing it a lot.


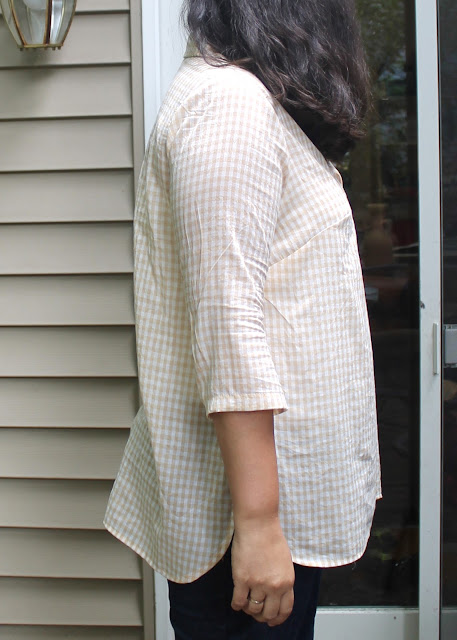
In an effort to remove a little volume at the back, I sewed the back pleat about an inch longer than called for in the pattern, though I didn't get any photos of it.  I think I'd prefer this pattern with a back yoke, though I don't have any plans to make that hack.

The sewing went smoothly, save for the serging accident suffered by my right sleeve.  I could have bought more fabric for a second sleeve but I decided just to patch it.  It's totally visible but it honestly does not bother me.  The sleeves also ended up wonky at the hem; I must have messed up while cutting them.  I had to shorten them a bit to straighten them before hemming.

I love the shape of the hem on this top.  Mine ended up a bit hi-lo, which I also really like.  I didn't find the hemming too difficult, but I can see that the hem is already getting flippy.  After three narrow curved hems on my Bonn shirts, I've tried a few different techniques, but my hems always end up flippy.  I've chosen to deal with it rather than get really frustrated and stop sewing woven tops.


The fabric is a poly voile I got for a steal - poly isn't usually my thing but it felt really nice, I loved the colors of the gingham, and it was $1.50/yard.  Problem is, it's totally see-through.  I do have a white cami to wear under it, so that's how it's going to have to be.

And here's one more photo of the top in its full smock-y maternity glory.


I'm not sure whether I will make this one again.  I'm tempted to try it again with a longer placket, in a heavier shirting for fall, but I also need to make a few woven tanks for summer and once I put the pattern away, it may take awhile for me to get it back out.  I am very momentum-driven.  Plus there are too many things to sew.  I've got my eye on that new Cashmerette Patterns Webster Top and am currently working on another tank Josephine to replace one that fell apart in the wash.

So thanks for reading, and see you next time!

Tuesday, June 6, 2017

V-neck Renfrews

V-necks used to be my t-shirt of choice.  In college I had a heather gray one with the most perfectly-shaped neckline.  I wore it twice a week for several years before it got lost in the laundry room.  After that, I searched to no avail to find another v-neck that fit me as well.  Once I began sewing, it had been so long since I'd worn a v-neck, that it never occurred to me to try to sew one.  But recently I was inspired by a great striped v-neck tee sewn by Inder.  I remembered that my Sewaholic Renfrew pattern had a v-neck view, so I got to tracing.


As for my most recent long-sleeved Renfrews, I cut a size 10 shoulder graded to a 16 and did a 1/2" forward shoulder adjustment.  I shaved 1/2" off the outer shoulder and 1/2" off the side seam at the top to deal with some excess fabric I always seem to have in the armpit, and I lengthened the top and the sleeve because I didn't want to use bands.

I couldn't be more thrilled with the results.  While it took me a little while to puzzle out how to sew the neckband, once I figured it out, it was pretty easy.  I normally construct knits entirely on my serger, but I found that in order to get a nice, sharp mitered point to my v, I needed to stitch about 1.5" on either side of the v's point using my sewing machine.  After that, I serged starting at the point, going around the neckline and ending by serging over the point again.  Then I wove in my serger tail and, voila, perfect v-neck!


I think the shape and depth of the v on this pattern is perfect.  I decided that I wanted a wider band on the white tee, more like my husband's undershirts, so I sewed the band on with a smaller seam allowance.

Since the long sleeve on the Renfrew has too much ease for me, I didn't bother with a full bicep adjustment.  Turns out I should have, though, as the sleeve on my first iteration were way too tight.  I tried a 1/2" adjustment on the small stripe Renfrew, but it wasn't enough (and the whole shirt turned out too tight for some reason). So for the white one, I did a 1" adjustment and then sewed it and the sides together with a 3/8" seam allowance, and it was perfect.

All the fabrics are stash from Fabric Mart.  The navy and white fabrics were listed as cotton/lycra jersey, but the navy one feels like it also has some poly in it, and the white definitely has some rayon.  The small stripe is a rayon/lycra.  I'm pretty psyched about the stripe placement on the neckline of that one.


It's nice to have some v-neck tees back in my closet.  I only completed them a few weeks ago but they've all already been worn multiple times.  Thanks for reading and see you next time!
SaveSave