A sewing blog about building a functional, cohesive handmade wardrobe, one garment at a time.

Friday, December 29, 2017

2017 Top 5 Hits

Top 5 
of 2017! (2)

This was a good year for hits.  I had a very hard time choosing just five.  Here's what I came up with.


Tuesday, December 26, 2017

2017 Top 5 Misses

Top 5 
of 2017! (3).jpg

Ah, the fails.  As I discussed in my year in review post, I had what I consider to be a very small number of fails.  Some of them still irritate me, though.

Friday, December 22, 2017

2017 in Review

I've never done a year-in-review post here before, despite having kept this blog for nearly four years.  But this year I tallied up all my sewing and crunched some numbers so that I could make a fun chart. The results surprised me!

Surprise #1: I sewed more for others than I did for myself.  I was under the impression that I've sewed overwhelmingly for myself for the last two years, but it's not true.  In 2017, I sewed 46 garments for myself (43 percent) and 62 garments for others - mostly my kids (57 percent).  I would have guessed that the proportion of selfish vs. unselfish sewing was more like 75/25 percent.  In 2016, I sewed 40 garments for myself (37 percent) and 58 for others, again, mostly my kids (63 percent).

Here's a graphic breakdown of my selfish sewing for the year:


Tuesday, December 19, 2017

Cowl-necks for winter

For the third winter in a  row, I sewed up a few Renfrews.  I've sewn the pattern 10 times before, and yet I still managed to ruin a cut of fabric by sewing a shirt that was too tight.  I blame my lack of methodical pattern notes.

Wednesday, December 13, 2017

Sewing for Kids: Yes, I still do!

Although this blog has become much more about my sewing for myself in the past year, I do still sew for my children.  I tend to stick to easy (and comfortable) knits, and I generally sew for them in huge batches over the course of a couple of weeks, two or three times per year.

I'm gathering up a bunch of the pieces I've made recently and dumping them all in this post.  It is going to be long, so bear with me.

I found this fall that Natasha (who is now 8), needed some fall/winter dresses.  And when you sew for one girl around here, you kind of have to sew for the other one, so 7-year-old Z was getting a new dress, too.


My intent was to make very simple jersey dresses that were roughly knee length.  But I sewed Natasha's out of a very unstable knit (probably poly and/or rayon with some lycra, though FabricMart listed it as a cotton/lycra), and the weight of the skirt pulled the bodice down much more than I had anticipated. She begged me to leave it long, and now she swishes around in what she calls her "simple dress," pretending to be a 19th century prairie girl.

I used the School Bus T-shirt pattern from Oliver+S for both dresses, in a slimmed-down size 5 for Natasha, and a straight 5 for Z.  Then I cut long width-of-fabric rectangles for the skirts and gathered them up, then stabilized the waist seam with knit interfacing before sewing them together.

Of course, after I made Natasha's dress, Zoia decided that hers also needed to be ankle length.  It's sewn out of a less drapey cotton interlock with a cotton/lycra jersey scrap for the neckband.  It turned out a little nightgown-esque because the interlock has less drape than the jersey, but she loves it.

The School Bus pattern has gotten a workout here lately.  I used it to make cotton interlock nightgowns for my daughters and oldest niece (hers is not pictured, but it's a tank version of the same nightgown).  These are constructed just like the dresses, but with an added ruffle at bottom.


As my kids have grown, my ability to use up small scraps for their clothing has decreased.  When the boys needed new pjs, I tried to use up most of remaining knit scraps.

I made these pjs out of a red and blue stripe cotton interlock I found at the thrift store last year.  The body of Niko's shirt is a cotton rib knit that's been hanging out in my stash for awhile.  The pants are Oliver+S Playtime Leggings - definitely my most-used pattern ever - in a size 4T + some length for Gabriel and size 2 for Niko.  I added a cuff on the larger pair to make them even longer.  Neckbands are cotton/lycra jersey scraps.  G's top is the School Bus T-shirt, and Niko's is the O+S Field Trip Raglan.


The second set is made from the same patterns (both shirts are Field Trip Raglans this time) and all cotton/lycra jersey except for Niko's pants, which took out the rest of the navy rib knit.


This set, for Gabriel, is another School Bus + Playtime and is made out of striped interlock and a really nice and thick brown cotton/lycra jersey, purchased years ago from Fabric Mart.


Natasha also needed some pants, so I made two more pairs of Playtime Leggings for her.  These are a size 4 with the length of an 8.  Next time I'm going to make the 5 plus length for her.  The gray ones are French terry with cotton/lycra jersey knee patches, and the black are cotton/lycra jersey.


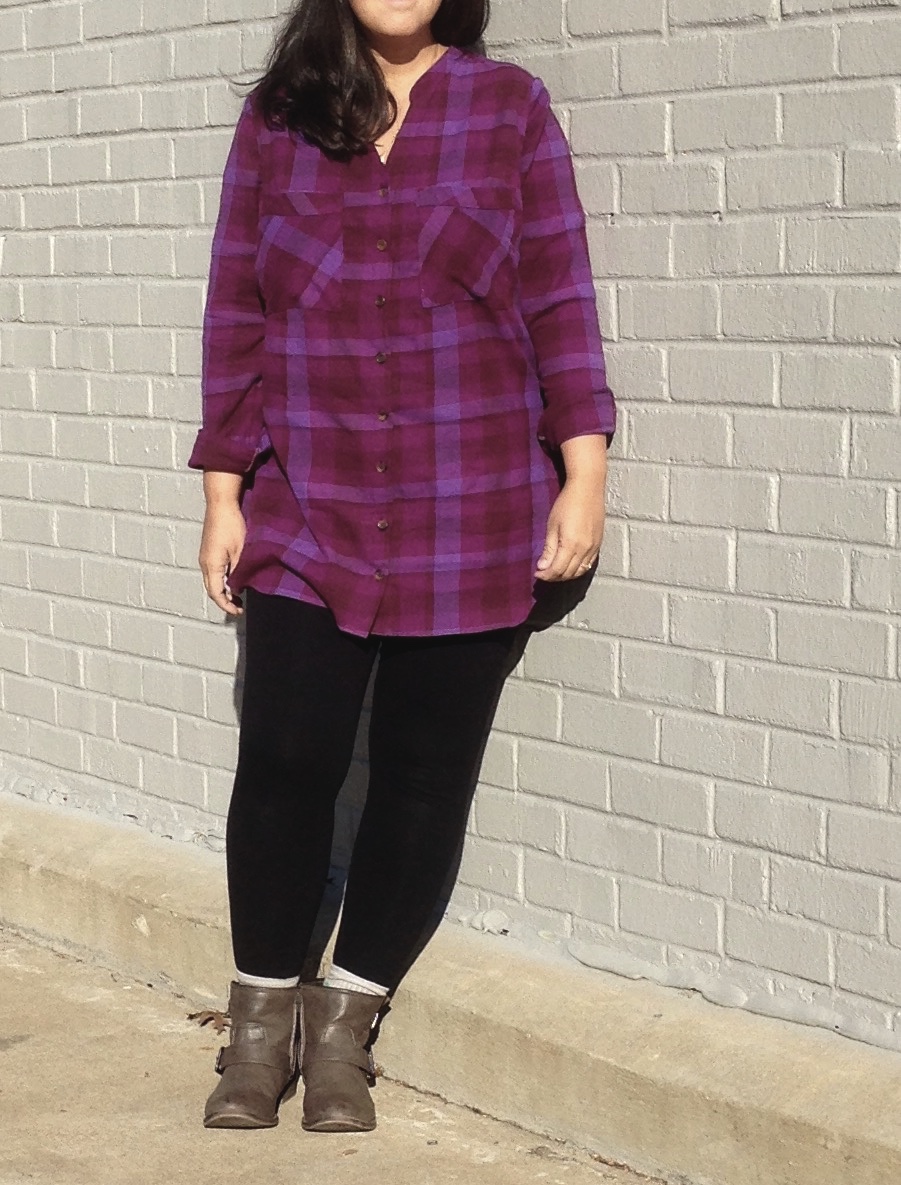
Last, I wanted to use up the less-than-a-yard of this flannel from Joann's that I used on my Bonn No. 5.  I also didn't want to buy a new pattern.  So I flipped through my one issue of Ottobre Design (Winter 6/2015), and found the Tiny Pussy Bow blouse, #21.  I traced it out in a size 110 with the armhole height of a 128 and the length of the 134.  I left off the pussy bow and just bound the neckline.  I wanted a bit of extra length so I added a ruffle at bottom.  I had so little fabric left that I had to piece that ruffle in five sections.  N loves the shirt and I feel good, having used up every scrap of fabric.


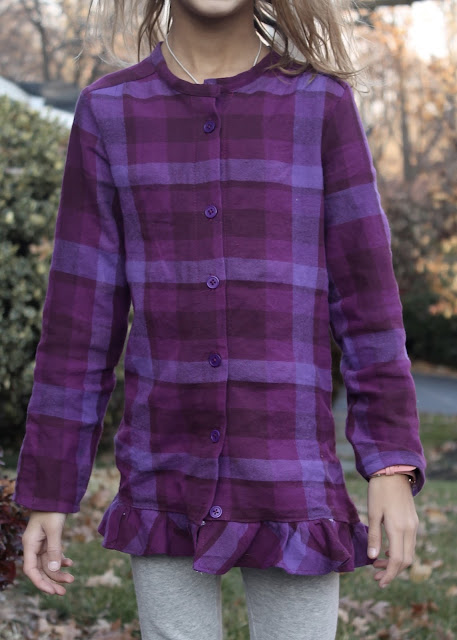
This pattern only has five pieces, which makes the tracing more tolerable.  The instructions were fine, and it went together quickly.  My only quibble is that the yoke is a single layer.  I didn't cut it on the bias because I was afraid it would distort without a facing.  But in this thick fabric, cut on grain, it works fine.  The pattern has a tiny bit of gathering at the front shoulder, which is hard to see in this fabric.  The back is supposed to be gathered too, but I decided to do an inverted pleat instead.  I'm very happy with this make.


There are a few other recent makes that I didn't manage to get pictures of - another pair of pjs and two pairs of leggings for Z and another School Bus dress for N.  Coming up for the end of the year, I will have my end-of-year sewing review and some Top 5 posts that I'm looking forward to sharing with you.

Thanks for reading, and see you next time!

Thursday, December 7, 2017

The Make-It-Up-As-I-Go Coat

Immediately after I made my wool jersey poncho, I started dreaming about a warmer one made in plaid wool.  This rust and teal 100% wool coating at FabricMart (sold out now) caught my eye, and I visited its web page every day until it finally went on sale.  I then bought 1.5 yards, having sketched out my poncho based on the last one that I made.


After it arrived, though, my plans changed.  I spent a lot of time draping it over myself, pinning here and there and redraping.   I didn't have enough yardage to make a full coat (even though Fabric Mart had actually sent me about 10 extra inches).   But I no longer wanted just a poncho.  So I pinned and draped a bit more, and then started cutting.  Essentially, I made this garment up as I went along.


I started by cutting my yardage in half crosswise.  Then I sewed the pieces back together where I had cut them, leaving an opening for my head.  Originally, I was going to sew up the sides to make sleeves, but I decided the plaid, which was no longer going to be on the bias as I had originally planned, needed to be broken up.  So I cut it down the front middle and made a button placket.  I put a dart in the back to make it fit my neck better.  Then I sewed up from the hem to make a side seam, pivoting toward the sides and sewing to the end to make sleeves.  

When I first tried it on, it was still a rectangle, and the sides flopped down in points.  That wasn't the look I was going for, so I decided to fold up the corners.


I cut the front piece where I had folded it, and then folded the back piece over to the front.  I sewed them down to create pockets.  The pockets aren't the most functional because they're placed in such a way that it's difficult to access them without reading across with the other hand.  But they are pockets and they're deep, so I can put keys and phone in them without worrying about losing them.


By the time I had done all that, our 50s and 60s had dropped into 40s, and I decided I needed this to be a warmer garment.  I found a large piece of bright red fleece in my stash to use as a lining.  I would have chosen a gray lining for this coat, but #stashbusting, so I went with the red.  Even worn open, the coat doesn't flop to the right side, so no one is ever going to see it.


Things were looking good at this point, but I wanted the sleeves a little longer.  I didn't have any more fabric, having used all but those triangle corners and the tiny bit I shaved off the front neckline. I found some heavy apparel flannel in my stash and made cuffs.  And I love them!  


For the placket, I went with the dark side of some 1" coconut shell buttons from the stash.  I didn't hem because I didn't want to lose any length.  


This coat isn't perfect by any means.  I didn't line it properly, so the fabric hangs a little funny.  And the sleeves are not fully lined due to fabric shortage.  But I am really happy with the way it looks and it is already my go-to jacket until we reach down-parka temperatures.  It did make me realize that I would like to make a proper coat sometime.  I love the collar on the Closet Case Files Clare Coat and want to try making it sometime in the future.


 Thanks for reading, and see you next time!


Thursday, November 30, 2017

Bonn 5: The Make It Work Shirt

Surprise, I made another Bonn (affiliate link).  I'm not sorry.  I'm going to make more.  You'll see another before long, I'm sure.  This one, though, is made out of the prettiest, softest flannel, and it's in a tunic length for extra coziness.


Funny story about the fabric.  The temperature briefly dipped into the 40s a few weeks ago, and I felt miserably cold.  I know, mid-40s isn't really that cold, but I am a naturally cold person, plus I'm a bit anemic, and that particular week, 40s may as well have been 10s.  One night after my husband came home, I couldn't take it anymore.  I told him I had to go buy flannel ASAP and I took off to Joann's at 8 p.m.  I haven't bought apparel flannel there before, and my expectations were quite low, so I was really excited to find a bolt of this stuff.  I can't find it on the web site, but it was one of only two 55" flannels on the shelf; most of the other apparel flannels are 41"-ish wide.  Plus it was the same price as the narrower flannels, and of course it was on sale.  I came home and washed and dried it three times, and was astounded when it came out of the wash pill-free.  It didn't even shrink that much.  So, I'm sorry I can't find it online, but if you see it in store you can buy with confidence.


I spent about an hour cutting my fabric, including lengthening the overall length by about 6" and narrowing the sleeve from the wrist to the elbow after comparing it to my Gallery Tunic pattern sleeve.  I thought I was careful in my cutting, and of course, I've made this shirt four times before with great results.  But somehow, my darts ended up way too low.  I have no idea what happened - I must not have had the fabric completely smoothed out while cutting, but I wasn't any hastier than I normally am. When I tried on the shirt before sewing on my pockets, I was very bummed.  The too-low darts really made a huge difference in the fit and it just wasn't the pattern I loved anymore.


However, I needed this flannel coziness in my wardrobe ASAP, so I just kept on trucking.  I had planned to make pockets anyway, and so I decided to make them extra huge to hide my darts.  I also placed them strategically to mitigate the poor-fit wrinkles as much as possible.


My cutting error wasn't limited to the dart.  Somehow this shirt also just ended up way too big.  Part of it was the improper dart placement, and part of it could be the way this thicker flannel behaves, but there was also just a lot of excess fabric.  I also think that I made my initial full bicep adjustment too large; I will need to remedy that before I make Bonn #6.

So on this shirt, I ended up taking it in about an inch, starting about 1.5" below the bust dart all the way up through the sleeve, ending slightly above my elbow crease.  The sleeves in this shirt are set in, so the adjustment was a bit sloppy as I didn't do it the "right way" by unpicking the sleeve; I just sewed straight over the seam.


I guess we can call this a "Make It Work" shirt.  The bad dart makes it feel a little sloppy, but it is so comfortable that I've worn it a bunch since it came off the machine.

As an aside, I'd like to mention that we lived in Moscow, Russia, not too long ago, and I was not nearly as wimpy about cold weather then, as I am now.  I think that I just used up all my cold tolerance during those two years when I forced myself to take the then-baby girls for walks in their stroller every day as long as the temperature was above 14F.  And now I'm done.


Thanks for reading, stay warm, and I'll see you next time.
SaveSave

Wednesday, November 22, 2017

Long Blackwood

My husband and I went to New York City last month, alone, to celebrate our anniversary.  One of the highlights was, of course, a trip to Mood Fabrics.  I went in with a list, which helped keep my shopping focused.  But even sticking to two sections of the store (wool knits and cotton shirtings), we managed to spend two hours there, and I was quite overwhelmed.


One item on my list was a sweater knit in a neutral color to make a long Blackwood cardigan.  I found an olive green that was almost exactly what I was looking for, but my husband talked me into buying this wool jersey instead.  He says I wear too much gray and black and apparently the green I had chosen was too close to those shades.


The fabric is a very cozy, nice quality knit.  I can't figure out what color it is; in the store it looked like a magenta-ish purple, but since bringing it home I feel like it might be more of a dusty wine.  Doesn't really matter; it plays the neutral role well, and I've yet to find an item in my closet with which it doesn't pair nicely.

I've previously made two Blackwoods (one unblogged, but you can see a photo on this Me-Made May roundup), but both were the shorter view A with no pockets.  This time I did view B with the pockets.  I attached the pockets to the cardigan using Wash-A-Way Wonder Tape instead of pinning, which has the added bonus of stabilizing the fabric to avoid wavy seams.


Like the last two time I sewed this, I sewed a medium at the top.  Where last time I graded to an XL at the bust and used the XL sleeve, this time I graded out about 1/2" beyond the XL (so maybe an XXL, I'm not sure) at the bottom of the armscye and kept that width all the way down.  I used the size L front band to compensate for the shortened distance between bust and shoulder, and it fit my modified pattern perfectly.  I also widened the sleeves 1/2" on each side , tapering to nothing roughly at the elbow (where there was already a good amount of room), because I wanted to be able to layer the cardigan over a long-sleeved shirt. This provides enough room for my knit tees, but is still a little tight over my woven button-down shirts.


Oh, I also sewed the sleeves the length dictated by the pattern.  Last time I thought they were too long, so I shortened them.  For this warmer version, I wanted cozier sleeves.  As drafted, the sleeves dip about 1.5" into my palm, and I think that's the perfect length.  The only think I think I'd change for next time is to make the pockets about 1" wider.  I can easily fit my phone and keys in them, but I think they would be cozier for hands if they were a little bigger, plus I think it would look cool.

And there will definitely be a next time.  Even with the pocket stabilization, this pattern doesn't take long to cut out and, once cut, sews up very quickly.  And I clearly need another long version, as I've been wearing it several times a week since I made it.


As always, thanks for reading, and see you next time!
SaveSaveSaveSave

Thursday, November 16, 2017

Ponchos for fall

Last week I had an hour to myself, as well as a hankering to use up a 2-yard cut of wool jersey I found at the thrift store last year (for $3.50!).  So I made this.

Make this DIY wool poncho in 30 minutes!

The jersey was the perfect warm, mid-weight, stable fabric for the button-up, drape-neck, fall poncho of my dreams.  I draped it over myself, pinned it, re-pinned and re-draped, and came up with my preferred proportions.  Basically my fabric was a 70" wide pentagon that was 33" long in the middle and 26" long at the sides.  I hemmed the top with interfacing, folded my fabric in half with the 26" sides aligned, and then sewed up all but 12" of the top.  

Make this DIY wool poncho in 30 minutes!

After I made it, I decided it needed something, and decided that that something was buttons.  I sewed the buttons through both layers of fabric rather than making buttonholes.  I used two different kinds of buttons because I was working from stash and didn't have enough of any of the ones I liked.  I toyed with alternating them, but in the end I just decided to group them together.  I really like how it looks, and since the buttons are just sewn on, I can replace them later if I want to without worrying about matching sizes.

Make this DIY wool poncho in 30 minutes!

I hemmed the top edge of the fabric so that the neck opening would be neat, before overlapping the top edges (where the buttons go) and sewing them together.  I left the bottom is left raw - this jersey won't ravel and I dig the sharp-edged look.  


Make this DIY wool poncho in 30 minutes!

Immediately after I finished it, the temperature dropped, and I've been wearing it pretty much non-stop ever since.  And as soon as she saw my poncho, my sweet little Z asked if I could make her one. As it happened, I had just enough fabric left over to make that happen.  She's been wearing it proudly ever since.


 I think she looks ridiculously cute in it, though I have to remind her to take it off before eating or (shudder) going to the bathroom.


So there you have it, Mommy-and-me wool ponchos. Keep scrolling for directions to make your own.  And as always, thanks for reading and see you next time! 


MAKE YOUR OWN PONCHO

Want to make your own poncho? Here's how I did it. I'm not the best technical illustrator, so hopefully these instructions are clear.

Instructions to make your own wool poncho.

Instructions to make your own wool poncho.

Instructions to make your own wool poncho.

Thanks for reading! If you try this out, please leave a comment and let me know how it went!

Make this DIY wool poncho in 30 minutes!

Wednesday, November 8, 2017

Gallery hack

I made another Gallery Tunic.  You'll be forgiven for thinking that it doesn't exactly look like a Gallery Tunic.  But I didn't actually set out to hack this pattern.  I prepped my fabric (via FabricMart, is originally from J.Crew and was described as a "cotton flannel voile") and started cutting with the full intention of making the pattern as drafted.  As I was cutting, though, ideas kept coming to me.  "I haven't made a shirt with a yoke for myself in awhile.  It really wouldn't be difficult to add a back yoke ..."  Then "I think a ruffly collar would be cool in this fabric."  Finally, "Oops, I accidentally cut my front in two pieces instead of on the fold ... guess I'll just go with it."


So, yeah, it doesn't really look like a Gallery Tunic.

But on to the nitty gritty.  I used the same sizing mods for this one as on my first Gallery Tunic.   I cut a size 8 with an FBA, the body being widened to a 16. The sleeve is also adjusted for a fuller bicep.


The part of this shirt that I'm most excited about is the ruffle collar.  I like the juxtaposition of the girly ruffle and the more masculine plaid.  To make the ruffle, I used the mandarin collar piece, and then cut a ruffle 1.5 times the length of the collar by 2.25".  Then I folded the ruffle in half lengthwise, gathered up the raw ends until the ruffle was the same length as the collar, and sewed it in between the two collar pieces, right sides together.  Using the 1/2" seam allowance, my ruffle finished at 5/8".  My collar did get stretched out somehow at the back, but since my hair is usually down, I'm not going to let it bother me too much.  I do really like how it looks at the front.  This fabric is very thin and drapey, so the collar flops open a little, which is what I was going for.  A ruffle collar that stands too close to the neck is not a look I feel comfortable in, but a floppy ruffle, I can totally do.


Once I realized I had made a mistake in cutting the front as two pieces rather than as one on the fold, I decided to just interface and fold the front edges to the wrong side to create a button placket.  The original pattern includes a 1" pleat at the bust, which then hangs free below the bust.  So I made each placket 1" and topstitched them down.  As you can see above, I didn't bother making buttonholes where I knew I wouldn't fasten the buttons.  The placket looks like it's angled at the top but it actually is completely straight.


The back yoke was another easy modification.  I lined the yoke via the burrito method and I really like the added detail of the bias-cut yoke at the back.  Although I was careful in my handling, and stay-stitched all necklines, I still ended up with some stretching at the back, as you can see below.  That will pretty much always be covered by my hair, though, and I can't see it, so it's ok :)


All in all, I'm quite happy with the way this shirt turned out.  For being super-lightweight, it's quite warm, and just the slightest bit scratchy, which makes me wonder whether there is any wool content.  I don't remember a wooly smell when I washed the fabric, though that was actually a couple of years ago ...


My single gripe with this shirt is the fact that it seems to highlight my bust in a way that my first Gallery does not.  I wonder whether this is because of my back yoke - the shirt is a little tighter across the bust than the first Gallery.  I may need to widen the bottom of the yoke a bit if I make this one again ... and like the first time I made the Gallery, I'm not certain I will try again.  But you never know. 


Thanks for reading, and see you next time!